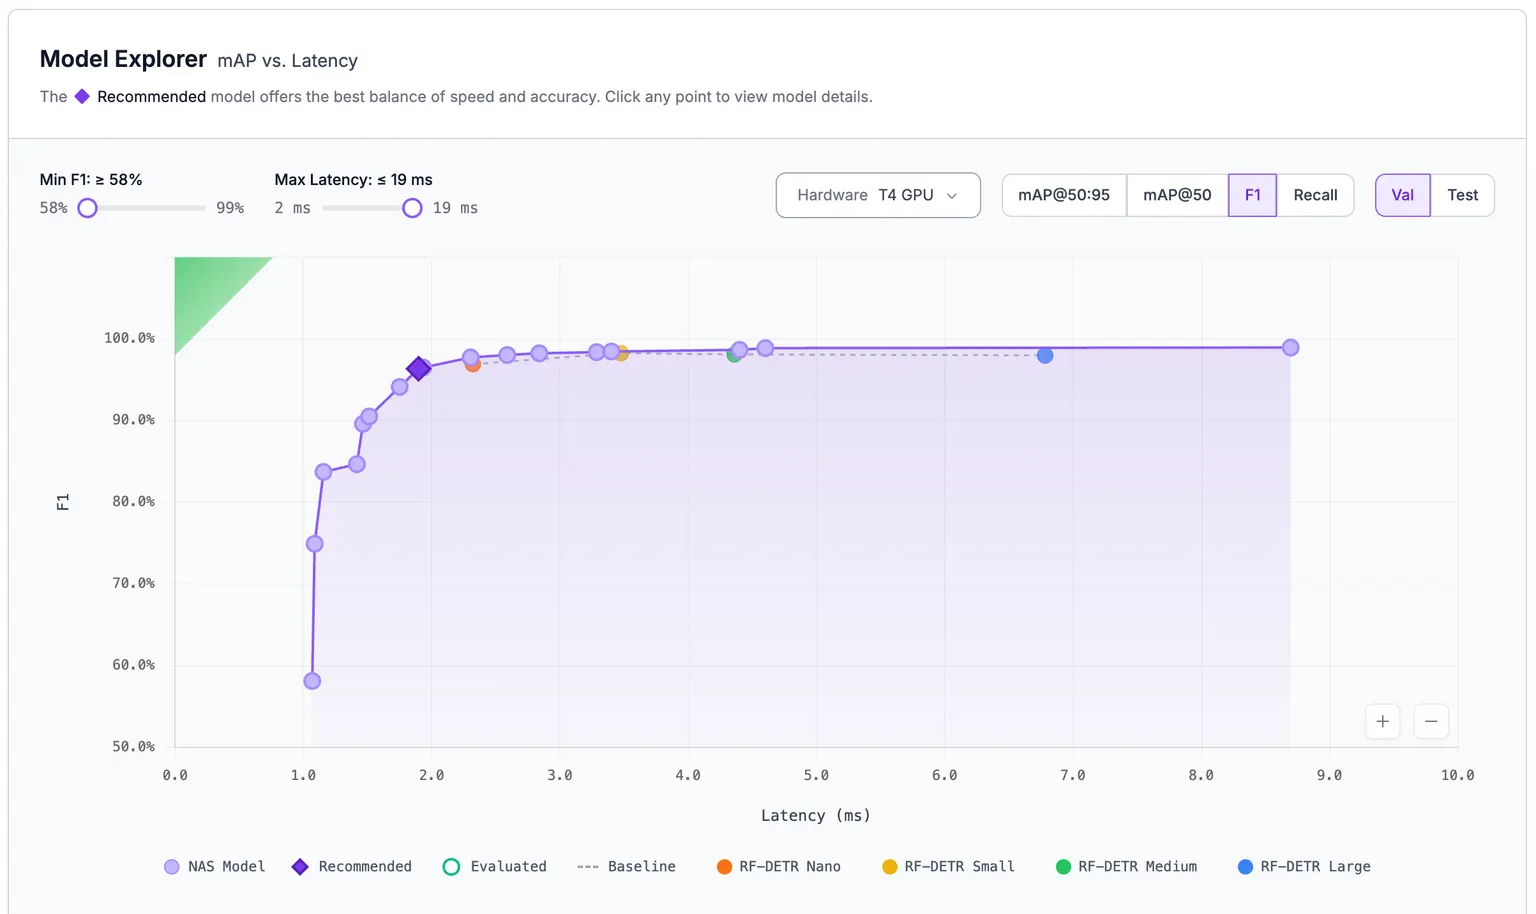
Roboflow's Neural Architecture Search (NAS) is a powerful new feature that automatically trains dozens of model architectures on your dataset and surfaces the best options along a speed-vs-accuracy tradeoff curve, generating many model options to choose from at a lower cost-per-model than traditional model training strategies.
As explained in the RF-DETR paper, this Neural Architecture Search strategy is what produced RF-DETR's SOTA model architecture. Roboflow is making the strategy available to all Roboflow customers, enabling anyone to produce SOTA models for their use case.
Neural Architecture Search:
- Identifies the model architecture that is most suited to your use case based on your data characteristics
- Fine tunes that architecture on your data
- Tests over 5,000 configurations, resulting in 10-100 trained models, optimized for accuracy at every latency point.
When to use Neural Architecture Search
NAS is almost always worth running when you're choosing the model that will go to production. Because every mined model on the Pareto frontier is fully trained on your data, you don't just pick a size - you pick the best speed/accuracy tradeoff for your specific deployment target. In real customer runs, NAS routinely beats a single RF-DETR Medium fine-tune at the same latency, and often by a wide margin.
Reach for NAS when:
- You need better accuracy at a given latency budget, or better latency at a given accuracy target.
- You're preparing a model for production and want to compare options along the speed/accuracy curve.
- You would otherwise run a hyperparameter sweep or train several model sizes back-to-back.
- You need state-of-the-art performance.
NAS may be overkill if:
- Your use case is straightforward and a "good enough" model is sufficient (ex: detecting people in a well-lit environment). For exploratory or early-stage projects, a single fine-tune is usually the right call.
- You only want the largest RF-DETR checkpoint (ex: RF-DETR XXL) and don't care about smaller trade-off points.
Cost, credits, and plan availability
NAS is available on all paid Roboflow plans that include usage-based billing. Trial, Free, and Public plan users do not have access to NAS. Legacy plans without usage-based billing will be prompted to enable it before starting a NAS run.
NAS runs are billed at the standard Roboflow training rate - 1 credit per 30 minutes of training time - the same hourly rate as any other training job. A run produces dozens of trained models, so the cost per model is lower than training each one individually, but the total credit spend for a single NAS job is higher than a single fine-tune.
Typical ranges to plan around:
- A ~2,500-image object detection dataset commonly runs ~18 hours (~36 credits).
- Instance Segmentation NAS is more GPU-intensive than object detection NAS - expect roughly 1.5–2x longer runs.
The Train UI shows estimated duration and credit cost before you start. If the estimate exceeds one day of training, you'll be asked to confirm before the job kicks off.
A NAS run bills its training and its architecture search separately, so you can set a credit cap on each one. Capping only the training phase leaves the search uncapped, and the reverse.
If your workspace has flex billing disabled and your included credits run out mid-run, NAS will stop automatically. To let a run complete regardless of your included-credit balance, enable flex billing before starting.
NAS vs. YOLO-NAS
The "Neural Architecture Search" engine described here is not the same as YOLO-NAS, a single YOLO-based architecture that also appears in the Roboflow model list. If you upgraded specifically to use NAS, make sure you're selecting the Neural Architecture Search engine on the Train page - not the YOLO-NAS model architecture.
Roboflow NAS starts from a stronger foundation by using RF-DETR, which incorporates more world knowledge into its backbone. From there, NAS tailors the architecture to your dataset - for example, if your data benefits from a model with fewer decoder layers, NAS can discover and deliver that architecture automatically.
Supported tasks and known limitations
NAS currently supports:
- Object Detection
- Instance Segmentation
Other current limitations:
- Raw weights (
.pt,.onnx, etc.) cannot be downloaded for use on third-party inference servers. NAS models run on Roboflow Serverless Cloud API, Dedicated Deployments, Workflows, Batch Processing, and self-hosted Roboflow Inference. To download and run NAS weights, we recommend Roboflow Inference. - NAS-discovered model weights are licensed under Roboflow's Platform Model License, which requires you hold a Roboflow account in good standing.
Start a NAS training run
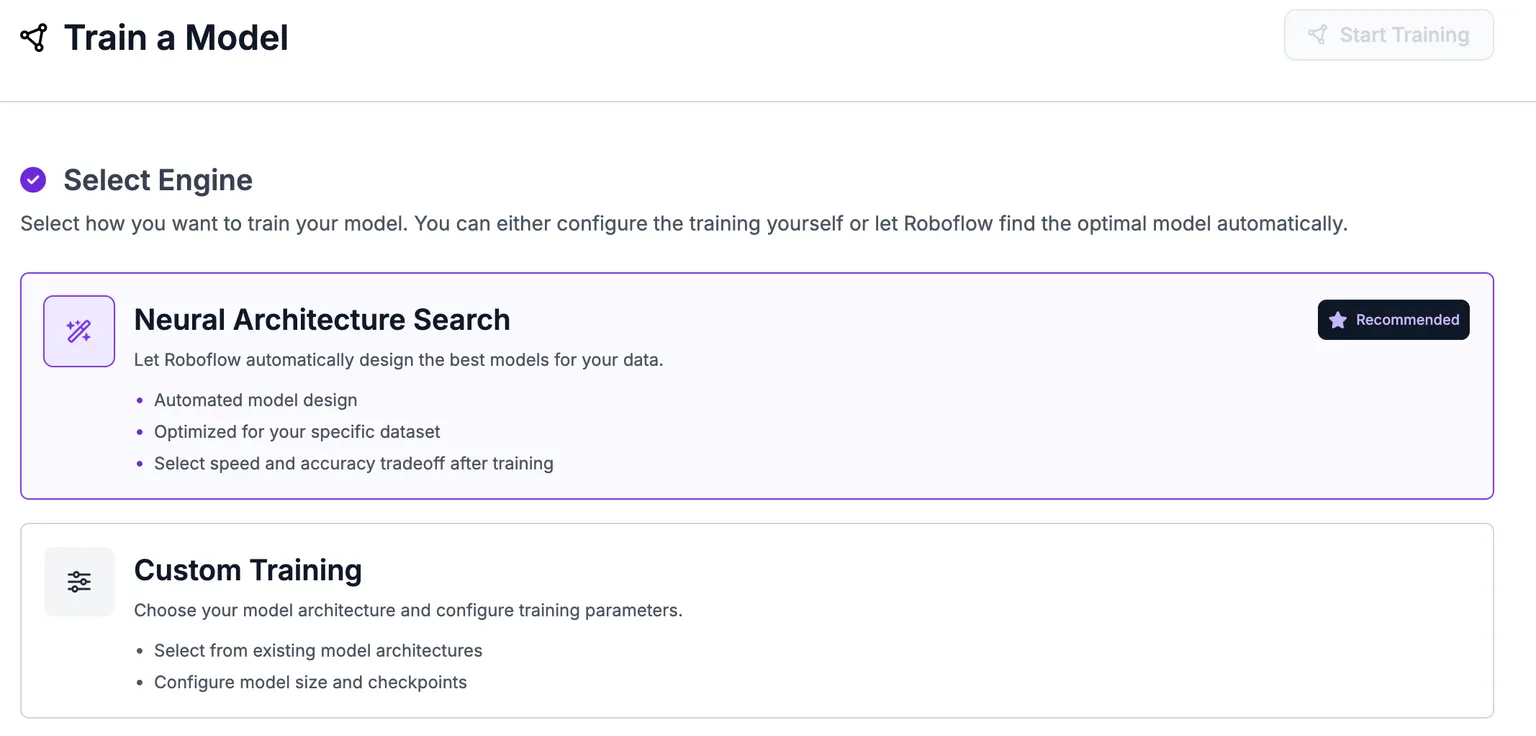
Open the Train tab and select the Neural Architecture Search engine
Open the Train tab in your project (at https://app.roboflow.com/YOUR_WORKSPACE/YOUR_PROJECT_NAME/train) and choose the Neural Architecture Search engine.
Select a backbone
For project types with multiple model variants (ex: object detection offers Fast, Standard, and Plus), you must select a backbone before continuing. Click the variant that fits your use case. For project types with a single variant (ex: instance segmentation), this is selected automatically.
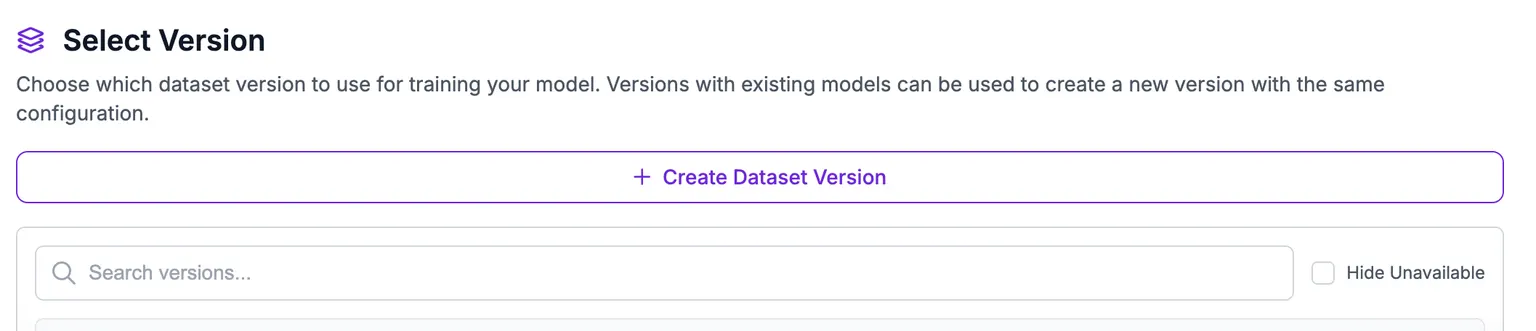
Select or create a dataset version
Pick an existing dataset version or create a new one. A few tips:
- We do not recommend adding augmentations to your dataset for NAS training.
- Your validation split must contain at least 15 images. NAS needs sufficient validation data to discover a stable Pareto frontier; the API will reject training requests with fewer than 15 validation images.
Select a backbone (object detection only)
For object detection projects, you can choose between three backbone options:
- Fast - Fastest training, discovers the lowest-latency models. Best for CPU or edge deployment where inference speed is the top priority.
- Standard - Balanced training time, discovers models across a wide latency range. Best for edge or GPU deployment where you want a good speed-vs-accuracy tradeoff.
- Plus - Discovers the most accurate models. Best for cloud GPU deployment where accuracy matters more than latency.
Instance segmentation projects use a single backbone and skip this step.
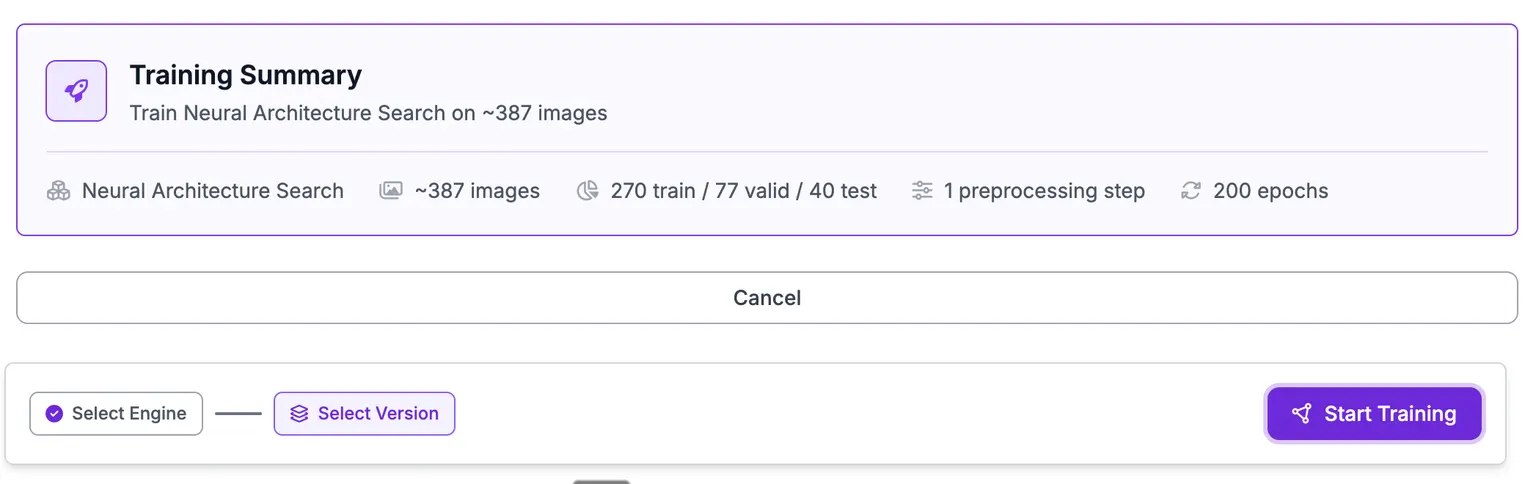
Start training
Click Start Training to kick off the run.
Reading the NAS results page
The results page shows every model NAS mined and trained on your data, plotted along the Pareto frontier - the best model discovered at each latency point. Each purple dot is a fully trained model you can deploy. The frontier updates live as mining progresses, so you can start evaluating candidates before the full run completes.
Picking a metric. Toggle between F1, mAP@50, and mAP@50:95 to evaluate the frontier against the metric that matters for your use case. Different models may appear on the frontier for different metrics - that's expected. Choose the metric that most closely reflects how you'll judge the model in production, then pick the best model at your target latency. We recommend F1 for most use cases.
Starring models. Star any models you want to use. Starred models appear in the Workflow model picker; unstarred models stay on the results page but are hidden from the picker to keep it uncluttered. Star as many or as few as you'd like - starring is free and reversible.
Using a starred model. Select it using the model block in a Workflow just like any other Roboflow model.
For more on the live training charts NAS displays during a run (the Training Progress Band and Epoch Snapshot views), see View Training Results.
Stopping a NAS run
A NAS job has two phases - training and mining - that run back-to-back in the same job. You have two ways to stop a run:
- Stop early (recommended when you're happy with the current frontier). Click "Stop Training Early" or "Stop Mining" depending on the phase. Models mined up to that point are kept and can be deployed. Credits used for completed work are billed. See Stop or Cancel a Training Job for details.
- Cancel (when you want to abandon the run entirely). Click "Cancel Training." No weights are saved, but credits are refunded if you cancel early in the job. See Stop or Cancel a Training Job.
NAS runs also stop themselves automatically when the model converges - i.e., reaches peak performance before all target epochs finish. A banner on the results page indicates this happened. No action is required on your part.
Deploying NAS-discovered models
NAS-discovered models deploy just like any other Roboflow-trained model. You can run them on:
- Roboflow Serverless Cloud API (see code examples below).
- Dedicated Deployments for higher throughput or reserved capacity.
- Workflows and Batch Processing for building and running vision pipelines.
- Self-hosted Roboflow Inference on your own hardware (Docker, edge, or cloud).
Running NAS models locally with Roboflow Inference
Install and start Roboflow Inference on your hardware, then point the inference-sdk at http://localhost:9001 and call it with your NAS model ID exactly as you would any other Roboflow model. The code examples below work against both the hosted endpoint and a local Inference server - just swap the api_url.
Roboflow Serverless Cloud API
import base64

import requests

API_KEY = "roboflow-API-KEY"
MODEL_ID = "your-workspace/the-model-id-here"
IMAGE_PATH = "your_image_path.png"

with open(IMAGE_PATH, "rb") as f:
    image_data = base64.b64encode(f.read()).decode("utf-8")

response = requests.post(
    f"https://serverless.roboflow.com/{MODEL_ID}",
    params={"api_key": API_KEY},
    headers={"Content-Type": "application/x-www-form-urlencoded"},
    data=image_data,
)

print(response.json())
To install dependencies, pip install inference-sdk.
from inference_sdk import InferenceHTTPClient

CLIENT = InferenceHTTPClient(
    api_url="https://serverless.roboflow.com",
    api_key="roboflow-API-KEY"
)

result = CLIENT.infer("your_image_path.png", model_id="your-workspace/the-model-id-here")
print(result)
Linux or MacOS
Retrieving JSON predictions for a local file called your_image_path.png:
base64 your_image_path.png | curl -d @- \
"https://serverless.roboflow.com/your-workspace/the-model-id-here?api_key=roboflow-API-KEY"
Inferring on an image hosted elsewhere on the web via its URL (don't forget to URL encode it):
curl -X POST "https://serverless.roboflow.com/your-workspace/the-model-id-here?\
api_key=roboflow-API-KEY&\
image=https%3A%2F%2Fi.imgur.com%2FPEEvqPN.png"
Node.js
These examples use the built-in fetch API. It works in Node.js 18 and later and in modern browsers, so there is no dependency to install.
Inferring on a Local Image
const fs = require("fs");

const image = fs.readFileSync("your_image_path.png", {
    encoding: "base64"
});

fetch("https://serverless.roboflow.com/your-workspace/the-model-id-here?api_key=roboflow-API-KEY", {
    method: "POST",
    headers: {
        "Content-Type": "application/x-www-form-urlencoded"
    },
    body: image
})
    .then((response) => {
        if (!response.ok) throw new Error("Request failed with status " + response.status);
        return response.json();
    })
    .then((data) => {
        console.log(data);
    })
    .catch((error) => {
        console.log(error.message);
    });
Inferring on an Image Hosted Elsewhere via URL
fetch(
    "https://serverless.roboflow.com/your-workspace/the-model-id-here?api_key=roboflow-API-KEY&image=" +
        encodeURIComponent("https://i.imgur.com/PEEvqPN.png"),
    {
        method: "POST"
    }
)
    .then((response) => {
        if (!response.ok) throw new Error("Request failed with status " + response.status);
        return response.json();
    })
    .then((data) => {
        console.log(data);
    })
    .catch((error) => {
        console.log(error.message);
    });